FIBERARY 2018 GROWING WELD FOR DYEING BY MICHELLE PARRISH


FIBERARY 2018

Growing Weld for Dyeing by Michelle Parrish


If you are a gardener who is interested in dyeing with plants, there are many interesting dye plants that you can grow in your garden. Weld (Reseda luteola) is one of them. It is originally a Eurasian plant, and its use dates back to antiquity. It has not naturalized here in New England, unlike so many other Eurasian plants. So, if you want to use it, you have to grow it yourself or buy it from a natural dye supply company. It is relatively expensive to buy, but it’s very easy to grow, so I encourage you to grow your own. Weld produces a very lightfast source of yellow, thanks to the luteolin that is present in all the above-ground parts of the plant.


To grow weld, I find that it is difficult to direct-sow. The seeds are incredibly small, and need to be kept consistently mois while germinating. I usually start the seeds in small pots and transplant them when they’re big enough.

The plant has a taproot, so transplant carefully. Weld prefers alkaline soil, and you can add chalk or lime to your bed if your soil is acidic. I am fairly certain that only the black seeds are viable, but it is hard to to separate the green and tan seeds efficiently, so I just plant a pinch of mixed seed and thin the seedlings if necessary. Wherever you put it in your garden, be sure to leave space for much larger plants in the second year.

Weld is a biennial, which means that its lifecycle takes two years. In the first year, the plant grows low to the ground in a round clump or rosette.

Second year spring

The leaves are long and thin with wavy edges. You can use the leaves in the first year by cutting them close to the center of the plant. The quantity of plant material that you can gather in the first year is relatively small, though, so I usually wait until the second year to harvest weld. In its second year, weld sends up a tall woody stalk that can get as high as 5 feet. It produces tons of tiny creamy-colored flowers that are attractive to bees and other insects. It is easy to save your own seed, though cleaning it can be a chore. Some dyers find that letting the plants go to seed produces an unwanted abundance of volunteer weld seedlings. In my experience, I get at most one or two volunteers a year, which is manageable.


To harvest weld, cut down the entire stalk in full bloom.

If you are saving seed, wait until you can see dark colored seeds at the lowest part of the flowering stalk before harvesting. The flower stalks keep adding new flowers at the tip, while the seeds mature at the base. You can use weld fresh, or dry it for future use. I hang it upside down from a laundry-drying rack to dry. In some years, I have noticed a strong smell as the weld dries. It is not to everyone’s liking, so be prepared to dry it with ventilation or move your drying set-up if the smell becomes objectionable.


Once it’s dry, chop up the plant material to reduce the bulk, and store it in a dry location until you are ready to use it. I usually put dried weld in a paper bag to absorb any condensation when there are temperature fluctuations, and seal that inside a plastic bag. It also keeps well in a cardboard box.


To read about my seed saving and germination experiments, please visit my blog Local Color Dyes.

Michelle is an accomplished Spinner, Natural Dyer and a grower of Flax.  Stay tuned for the second part of this wonderful dye series on Weld   Continue reading

FIBERARY 2018-SPINNING DOG FUR – SANDY CARDINAL

SPINNING DOG FUR  SANDY CARDINAL

Spin Dog Fur?

My curiosity about spinning dog fur, also called Chiengora and considered an exotic fiber, began shortly after I traded a treadle sewing machine for an old spinning wheel.  New to spinning, I tried twisting anything that vaguely resembled fiber and talked too much about what might be spun.

A family friend heard me wonder about dog fur and sometime later I received a box of English Sheep Dog fur.  Actually, it was a box filled with vacuum packed bags of dog fur.  Eventually I worked up enough courage to open a bag and let it explode into the room – and my learning curve began.

The first experiment was to card the fur with wool in order to give it some memory, knit some hats, and  wove scarves for the dog’s owners.

With plenty left over, more scarves, more hats, and there is still yarn left in the ‘someday for something’ pile.

Some Lessons learned with this first round included:

  • Wash the fur before spinning. The finished yarn left mud in the bottom of the pan, and needed multiple washes and rinses
  • Pure English Sheep Dog fur spins nicely with or without blending with wool.
  • It’s ok to throw away the matted clumps! It’s a waste of time to try to save every fiber.
  • This yarn had a ‘halo’ and worked best with loose or open patterns similar to angora
  • People are really impressed when they learn the yarn is dog, then promptly put it to their nose and ask if it smells like dog when it’s wet.

My second experiment was with the fur from a friend’s mixed breed spaniel/poodle,  named Winnie.

She barely sheds and her coat is more hair than fur with no noticeable undercoat.  This batch of dog fur was from her ‘haircuts’ by the groomer.


It was too slippery, wouldn’t hold together, so I blended it with wool to give it some grab.   Even after blending it with wool the yarn wanted to shed.

I returned Winnie’s yarn to her owner and don’t know if it was ever used.

Lessons Learned:

  • Different breeds, different results.
  • Technique for washing fur is easy – Soak in a big bowl with hot water & Dawn dish detergent (or shampoo), Rinse and spin dry in a Salad Spinner, spread the gobs out onto a towel, then transfer to screening (inside away from any breeze!).  And, Yes, it’s ok to use the kitchen sink because the salad spinner keeps the fur from getting to your drain.

Next adventure is with my own dog’s fur.  Big old Bernese Mountain Dog who hates to be brushed or combed.  But, what little she lets me do has become 15 tall wastebasket size bags full of washed fur ready to card and spin.


Lessons Learned:

  • Don’t procrastinate! Dog owners and groomers can be wonderful sources of fiber.


Many thanks Sandy for these wonderful lessons on spinning dog fur.


FIBERUARY 2018 SPINNING FLAX-NOTES FROM THE HANDSPINNER-LISA BERTOLDI

Spinning Flax Notes from the Handspinner   Lisa Bertoldi


The handspinning of flax gives me great satisfaction.  Giving me even more satisfaction is using the handspun thread as the weft in handwoven kitchen  towels.  The resulting fabric has a rustic look and a substantial hand.   Over time the linen thread lightens in color. and with subsequent numerous washings the thread becomes somewhat thinner.

I am buying flax for handspinning now from three interesting sources.

One is Taproot fiber Lab in Nova Scotia.  Patricia Bishop and her colleagues growing flax, retting it in the field, and preparing it in their workshop.  One may dye their dark flax and spin it up.  Imagine flax grown in Nova Scotia!  I have had good luck spinning it, and weaving with it.  The dark color washes quickly away.

Another source is Black Cat Farmstead in Wisconsin.  Weaver and spinner Andrea Myklebust grew a good crop of fax and drove it to Taproot Fiber Lab to have it processed.  Flax grown in the United States!  I am spinning it up into thread just now, a single about 8/1.  Soon to be i the weft ofkitchen towels.

The third source on which I rely on heavily is coming from Scandinavia.  I buy mine at Vavstuga Weaving School in SHelburne Falls.  It may also be available from other shops in the United States.  It is pale and on the fine side, supple.  My mainstay.

I spin what is called wetspun thread.  I keep a small water bowl handy near my left hand at the spinning wheel.  The water binds the fibers a bit and nicely smooths down the surface of the thread.  Some people swear by spittle, and spin their flax using only that.  I prefer to use water!  The other option is dry spun thread which is exactly as it sounds one spins the flax using dry fingers.  The resulting thread is a bit hairy as a result.  For certain applications this is a perfecty good choice.

I am currently practicing to spin a finer thread this winter.  By uing a distaff I find I can achieve  more uniform and even thread, which is my goal.  BY slowing down I am able to spin a bit finer with greater control.  Aiming toward a consistently thinner thread I find I need to take more frequent breaks, so that I can do finger stretches with a rubber band and squeeze a ball of a sort of putty (given to me by my physical therapist)   I soak my hands then in some hot water get a breath of fresh air and a sip of water and I am ready to continue.

Handwoven Goods | Whimsy & Tea | Handwoven Tea Towels

Lisa Dertoldi

http://www.weft.us

Weft Handwovens

FIBERARY 2018 COCHINEAL DYE- LISA BERTOLDI

NEWS FROM SHEEP 7 SHAWL

Sunday talks for February

Feb. 4th

Susan Wright Weaving with knitting Yarns

Feb. 11

Kristen Whittie  Running a Sheep Farm

Feb. 18 Peggy Hart Wool in America 1780-1840

Feb 25 Steve Prudy Nunoa ad the Alpacas of the 

Alt Plano

Call to register as there is limited seating.  413-397-3680

This is a free event, refreshments wil be provided   1:00 to 3:00 pm

Dyeing with cochineal.


Cochineal, Dactylopius coccus is a scale insect which has its life cycle on nopal, or Opuntia cactus.  It is cultivated on this cactus.  The insects have piercing mouth parts, which they use to puncture the cactus paddles thereby allowing them to take in the cactus juice on which they feed. One can visit Cochineal farms, for instance in Oaxaca in Mexico.  There one is able to see  the live insects in all stages of life living and thriving on the Opuntia cactus plants.


The adult and nymphal scale insect is filled with a red pigment, carminic acid, which has been used over time to color lipstick, foods and drinks, and fiber and fabric.  Carmine is the color name.


We as fiber practitioners are able to purchase the whole dried insect bodies, ground insect bodies, or an intense extract.


One of the interesting aspects of this dyestuff is that using distilled water results in much darker and richer colors.  Using tap water or well water means that results can be unpredictable (pale colors, often, in my case).  I highly recommend doing a series of experiments with a variety of water available to you when dyeing with cochineal, and especially using distilled water.  Cochineal in the dyebath is temperature sensitive and also pH sensitive. And as always, keep meticulous notes either on hang tags on your samples or in a notebook.


One aspect of cochineal is that it can be used as a substantive dye, thus with no mordant.  This is how I tend to use this insect.  The resulting color for me is a very saturated, rich and deep magenta.  I am quite satisfied with this simple and very slow approach to dyeing with cochineal.  A slow and gentle simmer on a very low fire is desirable, because higher temperatures shift the color away from the purple.


Typically dyers use cochineal as an adjective dye, in other words with a mordant to aid in the color binding to fiber.  I have used this method, as I am sure many of you have.  Aluminum sulfate is the common mordant fiber artists use for protein based fibers, such as wool and silk;  aluminum acetate is the molecule used for cellulosic fibers such as linen and cotton.


I like to let the dyed fiber rest and cool in the dyebath for at least twelve hours after a simmer.


Another insect based red dye was used in the Near East and parts nearby.   It is also called carmine, but from the kermes insect, species name Kermes vermilio.  This insect has its life cycle on oak trees.  Literature states that it is not lightfast, though its use was widespread in antiquity.  I have no personal experience with Kermes, though I have long been curious about it

Thank you Lisa Bertoldi for this interesting information about Cochineal.  I for one am looking forward to dyeing with it at our annual dye party.


FIBERUARY 2018

WELCOME TO FIBERUARY 2018


A HOUSE FULL OF WOOLEN PROJECTS

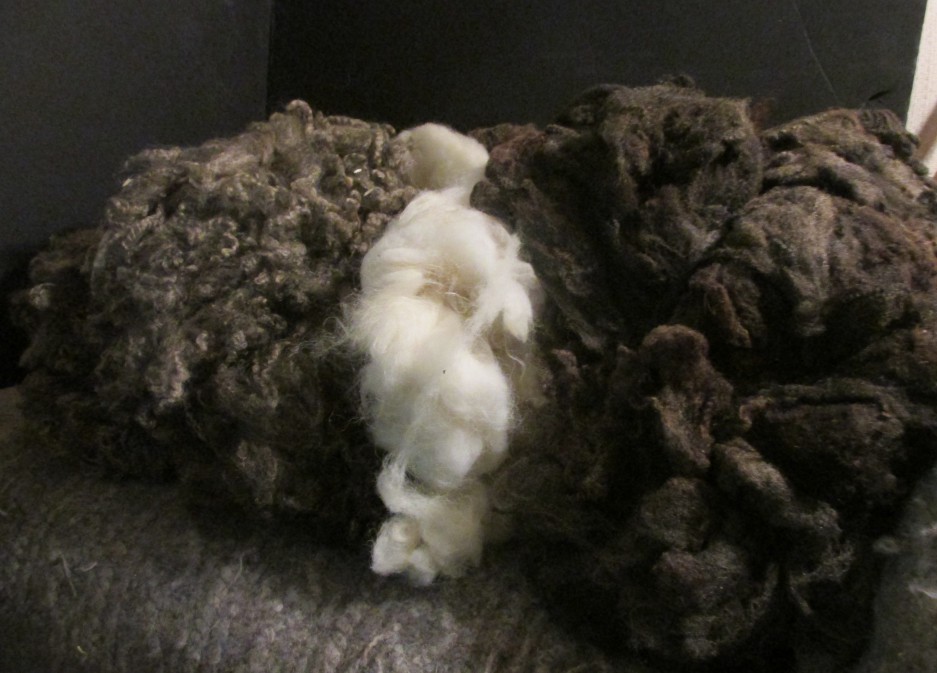
My house has wool tucked in every corner .  I fell in love with wool, sheep and spinning in the early 80’s and collected all kinds of wool like there would be no more.  Now in my early 70’s I am trying to find uses for it all.  I hope to finish some of the projects that have been sitting around this month..

IMG_8106

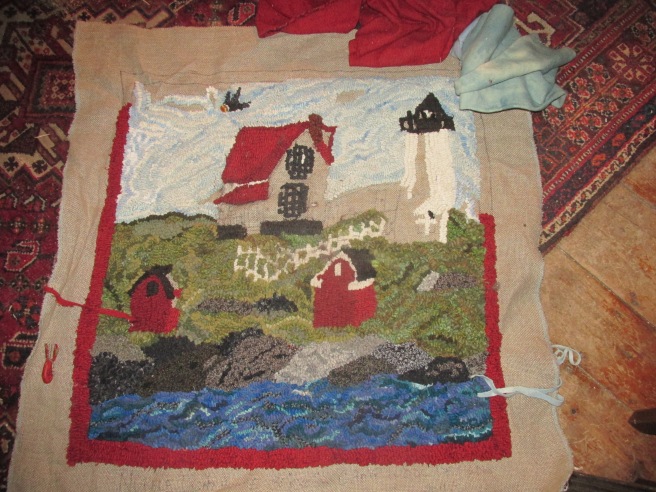
This is one of the projects which needs to be finished   I have been working on it for years.   Each area inteminated me and certainly brought me out of my comfort zone in hooking.  Thank you Deanne Fitzpatrick for pushing me forward on this project.   WIthout your example I would have never attempted it.

I am still spinning and took up rug hooking and made many huge rugs but my supply is still there.  This year I am going back to weaving in hopes to make woolen rugs and I hope that will deplete my boxes and boxes of lovely dyed handspun.

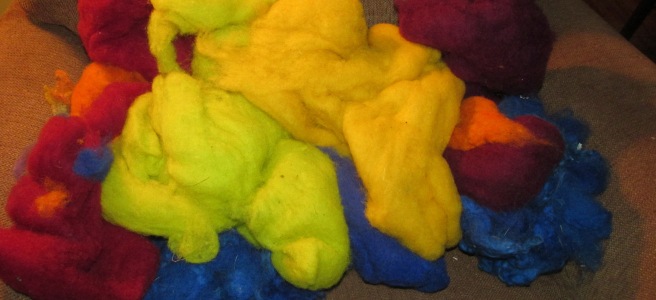
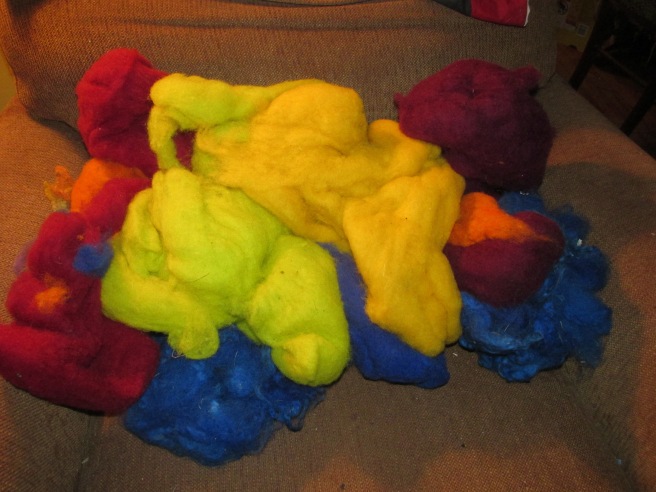
I have found there just isn’t a kind of wool that I don’t like, even the coarsest of wool’s have uses in rug making and felting.  On a recent trip to Ireland I could not resist these wild colors at Kerry Woolen Mills.

IMG_8108

I have started some fleece lined mittens with this wool.

IMG_8109

 I still have 4 sheep and love the quiet life of being a shepherdess.   This year I plan to send the wool out to a mill and have it made into yarn.  It is a wonderful way for me to share my love of sheep to others.

HANNAH HAUXWELL


Word has come to me that Hannah Hauxwell Of England has passed away and I wanted to share this with you.  She was 92.  She lived on a remote farm for most of her life and at age 35 after her parents passed, she took over the day-to-day chores on the farm.  In this very remote area there was no electricity or running water.  She battled poverty and hardship most of her life and did this all alone. She was discovered and  her life brought to the public eye through wonderful documentaries and her books and her life did get somewhat easier.   She carried a bale of hay on her back to feed her beloved cows.  When she felt she could no longer continue on the farm she, with help moved to a small town nearby.  Leaving her beloved cows was one of the saddest things but a neighbor agreed to take care of them.  The documentary’s can be seen on you tube and her books are available from Amazon.  She was such an inspiring woman.

Many thanks for reading Fiberuary,  please share your stories with our readers.  Contact me at wspines@aol.com

Carole

IMG_8105 Continue reading

FIBERUARY- NAAILBINDING BY KATHERINE JOHNSON

FIBERUARY       NAAILBINDING  BY KATHERINE JOHNSON

In September 2009, I opened my new issue of Piecework Magazine to read a re-print of a 1994 article by Linda Ligon called “The Ubiquitous Loop.” That was my introduction to simple looping, which became a gateway into the broader world of single needle work.

Simple looping is generally agreed to be the simplest form of single-needle fabric creation. The structure of it looks like this:


And here’s a piece I made in simple looping using jute garden twine (it’s upside down as compared to the drawing of the structure above):

It’s made with one needle (or no needle at all if your fiber is stiff and pointy enough to be worked by itself), and the movements are akin to hand sewing. In fact, the movements are exactly the same as for the buttonhole stitch in sewing or embroidery, only done in the air instead of in a piece of solid fabric.

And with this one “airy gesture,” as Ligon calls it, we span the millennia of human technology:

  • A fragment from Northern Germany about 7000 BCE, and net fragments from the Late Stone Age, Bronze Age, and Iron Age in Scandinavia and other northern European sites,
  • Fragments and a pouch or hat in a fancy openwork pattern from the desert southwest of the Dead Sea in about 6500 BCE,
  • A shirt from the first millennium BCE in Peru,
  • Sandals and bags from the first millennium CE in the American Southwest.
  • From historical accounts, baskets made by First Nations Athabascan-speaking people in northwestern Canada, and
  • Today in Papua New Guinea, Bolivia, Ecuador, and among the Hopi people, loop upon loop builds practical bucket-shaped bags, large decorative carrying bags, and gourd covers for ceremonial use.

Simple looping has been used for sturdy objects, like baskets, bags, and shoes. It has been used to create decorative edgings on larger textiles. It can be made simple and dense, or with skipped stitches and contours for an open, decorative fabric. Like crochet, it is endlessly organic and flexible. It’s very easy to create a fabric around an object, shaping as you go, to make a “sleeve” that was made to fit.

After reading the short article by Linda Ligon and then completing the tiny pouch from the related project, I was hooked. (If you’re interested in that pattern by Robin Taylor Dougherty, which includes a basic how-to on simple looping, you can find it on the Interweave Press website at http://www.interweave.com/article/needlework/a-treasure-pouch-in-simple-looping/). I made a couple of other pouches at different gauges, following the same basic idea. Then I found Donna Kallner (you can find her too online at http://www.donnakallnerfiberart.com/looping/about-looping/), bought her book, and worked through many of the projects in it. I fell deep into the rabbit hole of single needle work, adding traditional northern European needle binding (aka naalbinding, just to offer one possible spelling) to my list of fiber habits. Other single needle techniques include netting, needle lace, and (if you want to follow me right off the edge), shuttle tatting.

Give it a try. Maybe you’ll fall in love with this ancient, organic fabric-making approach. Just one needle and a couple arms’ lengths of yarn will connect you with some of humankind’s earliest technology


Katherine will be at Sheep and Shawl on Sunday March 5th.lecturing on Naailbinding and will be giving a one day work shop later in March.  Check out the Sheep and Shawl website for more details.


FIBERUARY-WEAVING BY EMILY WALSH GWYNN

FIBERuary is a celebration of all things fiber. I myself participate in a wide variety of fiber-related activities as a production weaver and a knitting teacher. I’m also a lazy spinner, an occasional felter and have dabbled in dyeing. Across all these fiberful activities the thing I love most is the community of other fabulous fiber fiends that make working with fiber so much fun. I could write about any of these communities, the spinning group that I have am lucky to be a part of, or of the wonderful dye party I attended last summer or about the joy of watching my knitting students learning not just from me, but from one another. But instead I am going to write about my weaving community, and in particular, about a wonderful, magical week-long collaboration I did with another young weaver, Kira Frech.
People often think of weaving as a solitary activity, and of course, it can be. But it needn’t be, and historically weaving would have been a community affair. I learned (in my time as an apprentice at the Vävstuga Weaving School) that in Sweden each village would have had a loom or looms in a sort of community center. Weavers would spend the winter cutting up rags which they would then weave on the community looms in spring (or whenever it was their turn). Weavers helped one another dress the loom and so many hands made light(er) work. Because of this Scandinavian tradition of cooperative weaving, students at Vävstuga learn to dress looms in teams.

Kira and I became friends when I was an apprentice and she came to Vävstiga for Basics, the pre-requisite for most other weaving courses there. Later, she returned for the Väv Immersion program, a 15-week course inspired by the weaving course Becky Ashenden had taken nearly 35 years ago at the Sätergläntan School in Sweden. We stay in touch thanks to the internet and earlier this year decided to create our own weaving mini-retreat and collaboration at my studio in Shelburne Falls. In 5 days we wound, beamed, threaded, sleyed and wove a 10-shaft satin damask block design and an 8 shaft pinwheel draft.

Damask:

Pinwheels

We each chose a project that was somewhat outside of our weaving norm and which allowed us to take advantage of each others expertise. I designed the pinwheel project in wool (for pillows!) with the knowledge that any troubles I had could be helped by Kira’s greater expertise in weaving wool. She designed the 10-shaft satin damask project in cotton and linen knowing that I spend a lot of time weaving similar block structures. We were thus able to support one another and felt encouraged to try new things.

Because we are trained, literally, in the same school of weaving, Kira and I were able to almost seamlessly move through the steps of setting up the looms together. It was truly magical. We worked together to solve problems along the way and accomplished more as a team than we could have flying solo. Here are some photos of us setting up the damask piece together.

Threading together:

Threading together and laughing:

Taking a break from sleying:

Once the weaving began our looms were booming and shuttles were flying and the studio just felt more alive. A few days later we were cutting off and packing things up so Kira could escape before a snowstorm hit. When she was gone the studio felt empty and I found myself wishing I could have a weaving buddy with me every day!

The bottom line is that weaving in community is so much better than weaving on your own. In fact, even Kira and I together could not have done this by ourselves! And that’s because we borrowed a pair of damask pulleys for this project from another local weaver, Elaine Palmer! It was only by all our powers combined that so much amazing weaving happened that week. I feel so grateful for my wonderful weaving community.

Happy FIBERurary.

-Emily

Emily F. Gwynn is a handweaver based in Shelburne Falls, MA. She specializes in weaving heirloom-quality textiles for the home. Visit her website atwww.handstoworktextiles.com

Kira Frech is a handweaver and natural dyer based in Harrisburg, PA. Visit her website at www.kirafrech.com

The Vävstuga Weaving School is located in Shelburne Falls, MA. While the apprenticeship program no longer exists, the 15-week Väv Immersion program is going strong and applications are being accepted now. For more information visit www.vavstuga.com

FIBERUARY- FIRST YEAR IN SHEEP BY MARTI FERGUSON

First Year In Sheep (almost), and Then Some

It’s February, 2017, and there are seven young Finnsheep up in my barn.

They are currently about 10 months old: five ewes and two rams. Most of them have been here since they were 10 weeks old.  Seeing as they are my first ever sheep, it’s been a busy, educational, eight months for me – but to be fair, the education began a long, long time before the sheep arrived.

Reading through FIBERuary, I see that most postings are expositions on pretty specific topics concerning any-of-many aspects of fiber, written by people with loads of experience and practice and time in their fields.  I’m essentially a raw beginner, and I’m still surfing the waves of anxiety and doubt that come right along with the excitement of a new venture. I can tell you what setting up a fiber farm has been for me, so far, but I can’t tell you how it will go from here, or where I’ll succeed and where I’ll need to, um, try harder.  For folks wondering what goes into starting a fiber venture with animals, I expect that there are as many paths as there are people.  Here’s a little view of mine…

Almost three years ago, when we moved to Western Mass from the mid-west, I knew I’d be looking to set up with animals. Though I wasn’t raised in the country, in Minnesota we’d had chickens and horses and land, so I had experience with pastures, tractors, manure piles, frozen water buckets, and the like – enough experience, hopefully, to know what I needed and what I was getting into. We found a property that would be suitable for a small flock and also meet the requirements of the other (human) members of my family.  It was time to buckle down and learn what I needed to do.

I tried to learn in whatever ways I could. There were books in the library, books on my bookshelves, magazines and websites. I attended online webinar series (yay! Maryland Sheep&Goat!), fencing seminars, Sheep and Wool Festivals and the workshops they hosted, Jill and Jim H-L’s Sheep-in-a-Day class (yay! pragmatic and hands-on!), Sheep Growers’ Association days. I talked to everyone I encountered who had or had had sheep.  I got a spinning wheel and learned how to use it.

I tried to learn something about EVERYTHING, or at least it feels that way.  Sheep breeds. Sheep diseases. The structure of wool, the structure of yarn. Fencing types, pros, cons. Livestock guard animals. Fleece processors. Mills. Carcasses. Wholesale cuts, retail cuts. Parasites. Forbes. Electricity. Drum carders. Combing. Picking. Flicking. Sheep reproduction. Scours. Scouring. Netting. Deep bedding. Skirting. Hoof trimming. Hay. Rhododendron, Yew, Mountain Laurel. Antibiotics. SubQ, IM. Drenching. CDT. Selenium. Copper. Hi-tensile knots. Coating. Creep. H. contortus. On and on. And all the while, I knew that I couldn’t really learn husbandry from a book – that at some point, soon, I was going to have to jump in with both feet and make my mistakes and take my knocks.


Getting my infrastructure in place took up the second summer in Massachusetts.  My property had lovely hillside pasture, but no fencing or barn.  I know that a lot of people run their sheep with portable electric netting alone, but I chose to build a permanent fence –  wood posts, woven wire, electrified wires at the top and bottom – and it helps me sleep when the coyotes are singing their crazy songs. My son and I built the entire fence by ourselves, and that is a whole ‘nother story entirely – I can just say that it was a rich learning experience.

Structure-wise, all the sheep would need was a simple shed.  But, for me, I built a barn (had it built, truly), one with four walls and doors that close. So now there is a place for the sheep, and room as well to store equipment and hay. And all of us, the ewes and me, will be comfortably out of the wind and wet when lambing time comes.   Currently, the barn seems really big, but with luck my estimates were sound, and when my flock reaches its full number, the square footage will be just right – Goldilocks style.

So a year and a half in, I had a barn and a fence and a head full of info, but when it came time to choose a specific breed of sheep, I was adrift.  I’d collected an embarrassing number of fleeces and partial fleeces, trying to decide what I liked for handspinning, but nothing was clicking. Or if I liked the fiber, I was finding that the breed was too wild, or too big, or not suited to a Massachusetts climate, or something else that made them not right for my farm.  I’d ruled out Finns early on because I didn’t like the sound of “litters of lambs”. One of Finnsheep’s most notable characteristics is their propensity to birth multiple lambs: not just twins, but triplets, quads, and beyond. Despite my reservations, I ended up talking to a Finn breeder at her booth at Rhinebeck in the fall of ’15. She assured me that Finnsheep’s awesome mothering instincts more than made up for the multiples – Finn mothers love their lambs and will not only NOT reject them (which sometimes happens with other breeds), they are even known to steal other ewes’ offspring.  This breeder assured me that she didn’t put up with bottle feeding lots of orphans, or “bummer” lambs, and that the sheep did the work. The conversation peaked my curiosity, and soon I was collecting more fleece samples, this time from different Finn farms.

And I loved what I found. Finn fleeces vary, from animal to animal and farm to farm, but they are generally soft and silky, retaining both a good degree of bounce and often remarkable luster.  They come in colors – there is a broad palate of blacks, browns, grays and fawns, and patterns – solid, badger (light top, dark under), HST (head, socks, tail) & Piebald. For me, they were fun to spin and easy to prep – not a lot of grease and easy to wash, with fairly uniform staple length and consistency within each fleece.  Some samples felted very easily, others not so much, so there is variability in that, too. And beyond the fleece characteristics, I really liked what I found about Finns as a breed:  they are medium sized animals, naturally short-tailed so no need for docking, hardy in our climate, used as dual-purpose animals (fiber and meat), and known for their very sweet dispositions.  And all those darling babies.  It looked like a good match for a new shepherd who would be working solo and wasn’t getting any younger. I picked my favorite sample and placed an order with that breeder, and waited for my lambs.

From the time I picked them up in mid-June, it’s been smooth enough sailing, I think. I can’t say I was prepared for absolutely everything or knew what to do at every turn, but the sheep have been sweet and easy, and so far everybody seems well. We’ve gotten through vaccinations (oh no, needles!), de-worming (not so bad), learning about electric netting (only takes once), separating the boys from the girls (don’t wait too long!), putting them back together (no fireworks to speak of- seems sheep are discreet), and learning to love hay and put up with the dull days of winter. By late summer, I got a llama to serve as sentinel for the flock.  Chris took to his new job with surprising conviction, and the lambs took to Chris with surprising affection. As our strange February weather begins to hint at spring and the maple trees get going, the flock’s fleeces are big and thick and I’m looking forward to shearing day, even though it’s clear that I’ll need to get better at keeping the hay out of their wool (dribbly llama, indeed).  I’m wondering if the girls will be showing their bellies when the wool comes off.  They are young, but Finns are said to be capable mothers even as yearlings, so we’ll see. They certainly tell me they’re hungry enough to be growing lambs, every time I show up in the barn to feed them!

So I was prepared, to the extent I could be, and I am pleased, beyond expectation.  All along as well, I’ve been making mistakes: doing things wrong and doing ‘em over.  Small stuff, mostly, I think – I’m likely not yet aware of half the mistakes I’ve made so far. Hopefully none of them is critical.  And while I hope my sheep are pregnant, I’ll certainly be terrified if, and when, the lambs arrive in a couple of months. In other words, not every day is easy, and not everything is fun. I’ll be glad when I have several seasons of shepherding under my belt, and when every situation is not brand new, another test to pass. But I’m grateful to be learning so much, and to have great people and resources at hand to teach me.  I’m grateful as well that this education so far has only scratched the surface: it’s headsmacking to appreciate how much there is that can be known, and learned, and done. If I keep the right attitude I will stay satisfyingly busy until I’m dead.  It’s good to have goals.

One thing I wasn’t expecting was how taken I’d be by these animals’ temperaments.  I thought sheep would be fairly neutral: interested in grass, grain, and each other, tolerant (I hoped) of their keeper. These sheep are curious, friendly, and sweet as well: I get tail wags and zipper nibbles, they get their faces petted. I always have help with whatever I’m shoveling, or moving, or mending. I don’t know if this is sheep in general, Finnsheep in particular, or just my sheep especially. And for this, I’m not really concerned to find an answer. I’m happy to be these sheep’s shepherd, and I’ll look forward to their mentoring.  Here’s thanks to the sheep in the year that’s passed, and thanks to sheep in the years to come!

Marti Ferguson

Buckland, MA, February 2017

FIBERUARY – PROFESSIONAL SHEEP SHEARING MODELS BY AARON LOUX

FIBERUARY


Professional Sheep Shearing Models
The subject of education and careers has been on the forefront of discussion in America in recent times. Young adults trying to find their way are faced with enormous decisions about where, when, and how to get started on a career path that will satisfy their goals. Some choose higher education, while others get started in a trade. From a very young age I knew that I loved working with sheep. I did many other odd jobs as a pre teen and teenager, but my passion was always with animal husbandry. In a way, I didn’t choose to be a full-time sheep shearer; one sheep at a time, and one new shearing job at a time, shearing sort of chose me.
At 18 years old, I too was unsure of where life would take me, and what I would end up doing to make a living. I was never afraid of hard work, and I had already been shearing sheep professionally for a couple of years. The important adults in my life had me convinced that shearing could be a good side gig, but would never be enough to live on. By my mid 20s I finally convinced myself and those around me that shearing was enough. The title “Just a sheep shearer” has never bothered me. Some people are a mile wide and an inch deep. If my skill set is only an inch wide, then I will keep pushing as deep as I can go. My interest in sheep and shearing has taken me to a hundreds of farms, in 15 states, and 3 foreign countries.
The profession of sheep shearing can vary quite a bit from place to place. The biggest factor is the size of flocks and how spread out the flocks are geographically. In places like Australia and New Zealand, where flocks are often enormous, the most efficient model is through contracting. Someone has to “organize the run”. It ends up being beneficial to both the farmers and shearers to have a middle man. For example, if a farmer has 20,000 sheep that need shearing, they would have a hard time finding the help for this once a year task. So they call a local contractor to sort out the details. Similarly, by working for a contractor, a shearer can count on steady work with plenty sheep. Contractors are often shearers themselves, so they understand the whole process. They will usually provide some amount of training, transportation, as well as lodging and meals. And when asked by the farmer, they also supply the wool handling help. Crews are sent out to jobs, and the entire process is efficient and seemless. Given the amount of sheep shorn in this manner, I would say most shearers in the world are employed by contractors.
In the western portion of the USA, flocks can be quite large, so a similar set up as just described, is used. But what about in the northeast where I am from? It’s an entirely different thing. Though a lot of shearers work together on bigger flocks, there is no middle man. There are pros and cons of people like me who are independent. The opportunity for learning is much worse. There are weekend courses which serve as a great introduction to shearing, but are nowhere sufficient for all of what a shearer has to know. The work load of coordinating and scheduling jobs is much more difficult. This means that skills like communication and customer service become very important, and adds a whole new dimension to the job. Also, with smaller flocks that are spread out, I spend lots of time driving. But I do enjoy the human aspect, and I wouldn’t trade the relationships I’ve developed with my customers for anything.
Aaron has just returned from Australia where he has spent time addig to his skills.  Do you need a shearer?  E-mail Aaro ar arronshearing@gmail.comImage may contain: one or more people and outdoor


FIBERUARY PRODDY AD HOOKYND ”HOOKY” RUGS BY DEBBIE PALMER

FIBERUARY


Proddy Rugs and “Hooky” rugs

By Deb Palmer

I love all things fiber. I look forward to FIBERuary every year to see some things I may never have seen before, or learn something new. I am lucky to have been a knitter (from age 6), spinner (from 1981), and basket maker for years. I also love to make practical things most of all- I use everything I make for everyday life. Scarfs, rugs, placemats and most loved of all- hand towels.


One of the fiberarts I love is rug hooking. I have made many traditional hooked rugs, where you pull the cut wool strip up through a foundation cloth (usually linen with a very loose weave). I was given a rug when I was born, featured in last year’s FIBERuary blog, of Mary Had a Little Lamb. That type of hooking uses very fine, shaded strips. I love the look, but myself usually use a more “primitive,”wider strip for hooking. Like this:

Displaying IMG_0332.JPG


Even these traditional rugs (which are called “hooky rugs” in Great Britain, are fine compared to “Proddy” rugs, also known as Proggy, Clippy, Peggy, and even Bodgy” rugs in England, where in the northern area, they have been used for years and years to make a warm surface to have on the stone floors.  The Beamish Museum, located in County Durham, has a wonderful collection. They also sponsored a book titled “From Rags to Riches,” by Rosemary E. Allen.  The Beamish museum site can be found at: www.beamish.org.uk    Rosemary E. Allen’s book is available online (https://www.amazon.com/Rags-Riches-North-Country-Rugs/dp/0905054121) .  For a  great primer on making them, from Gene Shepard, also available online ( Prodded Hooking for a Three-Dimensional Effect)  Proddy uses very wide strips of wool cloth- up to about ¾ of an inch, and the strips are about 3-4” long. A large hole gets made in the foundation (between threads of the weave) and the strip gets poked, or “prodded” through with a hand held tool. There are great videos and blog entries online for different methods. Just Google Making Proddy Rugs and you will find great pictures and instructions.

I make one of these every few years or so. I was taught to make them by Mary Jane Peabody, my friend in New Hampshire who has a wonderful blog, called “Mary Jane’s Rugs.” This is my favorite rug hooking blog. Here is a blog entry from her archives on finishing a very beautiful proddy rug:  http://www.maryjanesrugs.com/?p=3822  Mary Jane taught me to make the rugs without a frame, using a proddy stick- she carves them out of apple wood, but you can use any wide shank-to-pointed stick or tool. There are many types of tools that people use or make. There are also several methods- either “prodding” them into the hole, where you work with the back of the rug on top of your lap, or pulling with a proddy grasping tool. Mary Jane lived in England and learned to prod there. What I love about her blog is that it is about the intersect of art, design, and rug hooking and rug making. Don’t miss it!  (MaryJanesRugs.com)

Not surprisingly, a cat will gravitate to these rugs like bees to honey. When I have been making them, the cat will get on my lap and try to stay on top of it, or if that isn’t possible, go right under it as I work on it!Displaying IMG_0329.JPG


Below is my most recent proddy mat. I made it for my daughter. It’s the second one I have made her. The first was for her cats, Hadley and Hobbs. They, of course, love it. Now, her desk has a cold spot on the floor where her feet are, and she took the cat’s rugs and moved it there this winter. The cats, however, did not like this, as they preferred its previous location in a sunny spot. (They were “hissed off,” as I say!)

So, I made her a new one for her feet, to save harmony in the home.  It is a style called “mizzy-mazzy” in England- a kind of confetti like effect. I used some yardage and some leftover fabric from previous traditional hooked rug projects, and some sale-bin polar fleece. (Weird, I know! But it lightens up the weight and gives it some glints that I find interesting in texture).

Here is a picture:Displaying IMG_0331.JPG


Mine are quite utilitarian and simple. But really, there is no limit to design and color for these rugs. Like many of my projects, they are great users of upcycled materials. You can make beautiful ones out of wool clothing found at Salvation Army or Goodwill stores. I won’t get into the full instructions here- but they are easily found online. Cilla Cameron in England is a well-known rug hooker and designer who does lovely rugs. My friend Heather Ritchie, in England, (http://www.rugmaker.co.uk/) has a wonderful site, and I just love her YouTube video (https://www.youtube.com/watch?v=WW6irT_GwDg)  Heather is a truly amazing artist and a wonderful human being. She runs a charity in the Gambia, in Africa, teaching blind people to make rugs, and facilitating the sale of them to improve their lives. It’s called Rug Aid.  Check it out! http://www.rug-aid.org/


You never really know where your art or craft will take you!